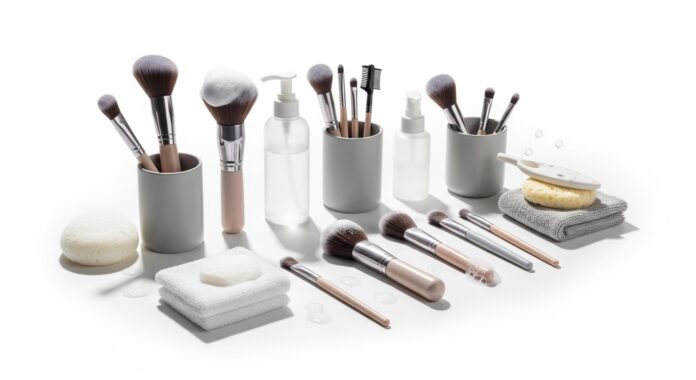
Samantha, a devoted beauty enthusiast, was always excited about her morning makeup routine. Her vanity was a treasure trove of good brushes, each chosen for a specific purpose. Then one day she noticed her favourite foundation brush wasn’t performing the way it used to — the bristles felt stiff, almost gritty, and her skin had started looking irritated in a way she couldn’t explain. The brush was the culprit, and she hadn’t washed it in months.
It’s an easy thing to overlook. Brushes get used daily, live out in the open, and rarely look dirty enough to demand attention. But they’re collecting product, oil, dead skin, and bacteria the whole time — and every application puts that mixture straight back onto your face.
This guide covers why brush hygiene matters more than most people realise, how to clean brushes properly without damaging them, and how often each type actually needs washing.
Why Cleaning Your Makeup Brushes Matters
Dirty brushes aren’t just a cosmetic problem. Dermatologists at the American Academy of Dermatology are fairly direct about this: brushes collect product residue, dirt and oil, and become a breeding ground for bacteria — which can show up on your skin as acne breakouts and rashes. The AAD notes that dirty brushes can also cause genuine infections, including fungal infections, E. coli, and staph infections, the last of which can be serious.
Beyond skin health, there’s a performance argument. A brush loaded with old foundation doesn’t pick up or blend new product properly. Colours go muddy, coverage goes patchy, and blending takes longer than it should. A lot of application problems people blame on their makeup are actually brush problems.
There’s also a cost angle. Brushes are an investment, and product buildup is what breaks down bristles over time. Regular cleaning genuinely extends how long a good brush lasts.
How to Clean Your Makeup Brushes, Step by Step
1. Gather your supplies
You need very little: a gentle brush cleanser or mild soap, lukewarm water, and a clean towel. A silicone cleaning mat or glove helps work residue out of denser brush heads, but it’s optional — your palm works fine.
You don’t need a specialised product. Dermatologists commonly suggest a gentle shampoo, including baby shampoo, as a perfectly effective option. What matters more is that it’s gentle rather than harsh or heavily fragranced.
2. Rinse the bristles
Start by rinsing the brush head under lukewarm water, holding it with the bristles pointing downward. This is the single most important habit in the whole process. Water running up into the ferrule — the metal band connecting bristles to handle — dissolves the glue holding everything together, which is what causes brushes to shed and eventually fall apart.
Avoid hot water, which can damage bristles, particularly natural hair ones.
3. Lather with cleanser
Put a small amount of cleanser into your palm or onto a cleaning mat, then swirl the wet brush head into it, massaging gently to work the lather through the bristles. Fifteen to twenty seconds of gentle work is usually enough for everyday buildup.
Don’t scrub aggressively, and don’t let brushes soak in soapy water. Soaking is another reliable way to break down the glue in the ferrule and ruin an otherwise good brush.
4. Rinse again, thoroughly
Rinse under lukewarm water — bristles still pointing down — until the water runs completely clear. Leftover cleanser is a common cause of skin irritation that people wrongly attribute to their makeup, so this step is worth being patient with. Dense foundation brushes may need a second lather-and-rinse if the water is still running cloudy.
5. Reshape and dry
Gently squeeze out excess water and reshape the brush head back to its original form while damp. Bristles largely dry in whatever shape you leave them, so this step determines how the brush performs next time.
For drying, lay brushes flat on a clean towel with the heads hanging slightly over the edge of a counter, so air circulates around the bristles and water can’t run back into the ferrule. Never dry brushes standing upright in a cup — that’s exactly how water reaches the glue.
Allow brushes to dry completely before using or storing them. Depending on the brush density and the room, this typically takes anywhere from a few hours to overnight. Storing a brush that’s still damp is how mould and bacteria get a foothold.
How Often Should You Clean Your Brushes?
The American Academy of Dermatology recommends washing makeup brushes every seven to 10 days. That’s the general benchmark worth working from, with a few practical adjustments depending on what a brush is used for.
Liquid product brushes — foundation, concealer, cream blush — need more frequent attention than the general guideline. Liquid and cream formulas are where bacteria grow most readily, so these benefit from more regular washing, and ideally shouldn’t go longer than a week.
Powder and eyeshadow brushes hold up longer between washes, since dry products are less hospitable to bacterial growth. The seven-to-10-day guideline suits these well.
Eye brushes deserve particular attention regardless of frequency, since the eye area is more vulnerable to irritation and infection. If you’ve had any eye infection, any brush used around the eyes should be washed thoroughly or replaced.
If a full wash every week feels unrealistic, a practical compromise is a quick spot-clean between proper washes. Quick-dry brush cleaners — sprays or solutions that lift residue without a full water wash — let you reset a brush between uses, particularly useful for eyeshadow brushes when you’re switching between shades in the same session.
How Clean Brushes Affect Your Skin
The connection between brush hygiene and skin is fairly direct. Every application with a dirty brush transfers accumulated bacteria, oil, and dead skin cells back onto your face — and then blends them in, which is worse than simply leaving them on the surface.
For anyone already dealing with acne, this creates a cycle that’s hard to break: brushes pick up bacteria from breakout-prone areas, then redistribute it across the rest of the face. People who treat their skin diligently but never clean their tools often find that brush hygiene was the missing piece.
Sensitive skin is especially affected. Old product residue oxidises over time, and preservatives that were stable in fresh product become less so — which means a dirty brush can cause reactions even when the makeup itself is fine.
Tips for Maintaining Your Brushes
Avoid harsh chemicals. Strong detergents and alcohol-heavy cleaners strip natural bristles and dry out synthetic ones, making them stiff and scratchy. Gentle is genuinely better here.
Store them properly. Keep brushes somewhere clean and dry, ideally upright in a holder or flat in a drawer once fully dry. Avoid sealed containers or makeup bags for long-term storage — trapped moisture encourages exactly the bacterial growth you’re trying to prevent. If you travel with brushes, a case with some ventilation is better than a zipped plastic pouch.
Keep brush heads covered while travelling. Brush guards or a simple wrap protect the shape of the head and keep bristles from picking up debris in a bag.
Replace brushes when they’re done. Even well-maintained brushes wear out. Well-cared-for brushes can last several years, but the signals that it’s time to replace one are clear enough: bristles that have become frayed, stiff, or scratchy, shedding that continues after washing, or a brush head that no longer holds its shape. Makeup sponges and blenders have a much shorter lifespan — around three months — since their porous structure holds moisture and is far harder to get properly clean.
Clean brushes you don’t use, too. Brushes sitting out on a vanity collect dust and airborne debris even when they’re not being used. Include them in your routine occasionally.
Cleaning Different Brush Types
Not every brush responds the same way to washing, and a few adjustments help.
Dense foundation and buffing brushes hold the most product and take the longest to clean properly. These are the ones most likely to need a second lather, and the ones where a textured cleaning mat genuinely earns its place — working the bristles against texture lifts residue from deep in the brush head in a way palm-washing struggles to match.
Fluffy powder brushes need a lighter touch. They’re usually less soiled, but their loose bristles are easier to damage with aggressive scrubbing. Gentle swirling is enough, and reshaping while damp matters more here than on denser brushes, since a fluffy head that dries misshapen is noticeably harder to use.
Small detail and eyeliner brushes are easy to over-handle. Their bristles are fine and the ferrule is small, so they’re particularly vulnerable to water seeping in. Cleaning just the tip, rather than dunking the whole head, is usually sufficient.
Natural-hair brushes are essentially hair, and respond to cleaning the way hair does. A gentle shampoo suits them well, and some people follow with a tiny amount of conditioner, rinsed thoroughly, to keep bristles soft. Synthetic brushes don’t need this and generally tolerate washing better overall.
When to Do a Deep Clean
Alongside regular washing, a more thorough clean every month or so is worth doing, particularly for brushes used with liquid or cream products.
A deep clean mostly means being more patient rather than more aggressive: a second or third lather, more time working cleanser through the base of the bristles where product accumulates most, and a longer rinse until water runs genuinely clear rather than just mostly clear. Some people add a diluted vinegar rinse afterwards as a disinfecting step, followed by a thorough final rinse in plain water.
The signs a brush needs a deep clean rather than a quick wash are usually visible: a stiff or clumped base near the ferrule, colour that doesn’t fully rinse out, or a brush that feels different in use even after a normal wash. If that persists after a thorough clean, the brush is likely at the end of its useful life rather than merely dirty.
Common Brush-Cleaning Mistakes
Drying brushes upright. Worth repeating, because it’s the most common and most damaging mistake. Water runs down into the ferrule, dissolves the glue, and the brush starts shedding within weeks.
Soaking brushes. Leaving brushes submerged does the same damage as drying them upright, just faster.
Using water that’s too hot. Hot water damages bristles, particularly natural ones, leaving them coarse and less able to hold product.
Not rinsing completely. Residual cleanser sitting in the bristles transfers straight onto your skin the next time you use the brush — a frequent cause of unexplained irritation.
Using them before they’re fully dry. A damp brush applies product poorly and reintroduces moisture into the ferrule. Having a second set of everyday brushes makes it much easier to give each set time to dry properly.
Final Thoughts
Brush cleaning is one of those small habits with a genuinely outsized effect. Cleaner tools mean better application, fewer unexplained breakouts, and brushes that last years instead of months.
The routine itself is simple: gentle cleanser, lukewarm water, bristles pointing down, reshape and dry flat. Aim for the AAD’s every-seven-to-10-days benchmark, wash liquid-product brushes more often, and give each one time to dry fully before it goes back in rotation. Like Samantha discovered, the fix for makeup that’s stopped performing is often sitting right there on the vanity — it just needs washing.

